Tuesday, July 31, 2012

YouTube Channel!

geekyGAMERgirl has a YouTube channel!  Woo!  Well, I only have one video up for now, but it's pretty awesome if I say so myself.  Last night I decided to play around and just do a quick sketch of a monster and make him up in one night while recording what I did.  My husband recently bought some pretty expensive video editing software (which he has not used...) so I decided to play around with time lapse and other things.


I'll put a YouTube link to my channel on the side bar, as well as a link to the geekyGAMERgirl Facebook page.  

Update on the Foxtopus monster... I'm still working out kinks in the pattern.  But I should have his prototype done fairly soon!

Friday, July 27, 2012

Foxtopus!

Lately I have been working with a new character I want to turn plush!  ... the Foxtopus!

I think I have finally settled on a design that I like for him.


I think I'm going to add a few more legs, and a bit bigger ears.  Then, prototype plush done in felt, probably three or four times just to make changes in the pattern until I'm happy.  Then.. faux fur foxtopus plush!  I'm super excited about this one.

Also, I was being my internet troll self the other day and I ran across a site called www.kickstarter.com.  You can put a project on there (a creative project or invention.. things like that. No business startups unless its for a new product or tuition begging or anything...) and try to convince people to fund it.  A number of people have gotten their plush designs funded for material to make them, so I may give it a whirl.

It's a great site.  Pretty much you pitch your idea, and offer rewards for amounts people pledge.  Say, if you pledge over $5, you get a keychain or something similarly cheap.  If you pledge over $15 you get a slightly larger reward, and so on.  You choose the amounts for rewards, and you have to provide the rewards as well.  But you just factor the cost of rewards in the amount  you pitch for.  Amazon and Kickstarter.com take about 10% in fees... plus it's all or nothing funding. If you meet your goal (or over) you get the money.  If the goal isn't met you get nothing (but you're out nothing as well!).

Any way... Foxtopus coming soon! Check back for updates.

Wednesday, July 25, 2012

Free Giveaway!

I opened up a geekyGAMERgirl Facebook page! Woo!  To celebrate, let's do a giveaway.  That's right... free stuff!


a Rafflecopter giveaway

For participating in this giveaway, you will be entered in to win one CUSTOM baby cloud monster!  You will be able to pick your monster's face coloring and style (any color), fur coloring (white or gray) and number of eyes and size of eyes. You just tell me what you want your baby cloud monster to look like... I'll create it for free for the winner! (free shipping too!)

This contest is only available to US residents. Ends August 8, 2012.  Winner will be announced August 9, 2012! You must "LIKE" the geekyGAMERgirl Facebook page to enter, and in order to gain access to additional ways to enter more times.

I also wanted to share how I package my monsters.  It's important to be creative in your packaging, as well as your shop items.  Here's how I do it!


I wrap up the monsters in bright colorful tissue paper, include their original sketches and a packing slip and... voila!  My husband's reaction, when I first did this, was literally "WTH Heather...?".... but I love it.  It's personal, it's creative, and it's freaking cute.

Oh! And Adora has come by from her sky-cave to find a new home, as well. You can check her out on my Etsy.


And a big shout out to Matin Lapin for featuring our very own Trevor the Thundercloud Monster in her blog,  that you can read here, and in an Etsy treasury in honor of Ilyap'a Day that you can see here!  Check out her Etsy store, too.  She has a lot of cool items, see them here!


Tuesday, July 24, 2012

The Birth of the Cloud Monster

Lately, I've been sewing my fingers off.  I love making completely handmade plushies, and I've gotten rather good (if I can say so myself).  This is the first time I've worked with faux fur, and I think I'm in love.


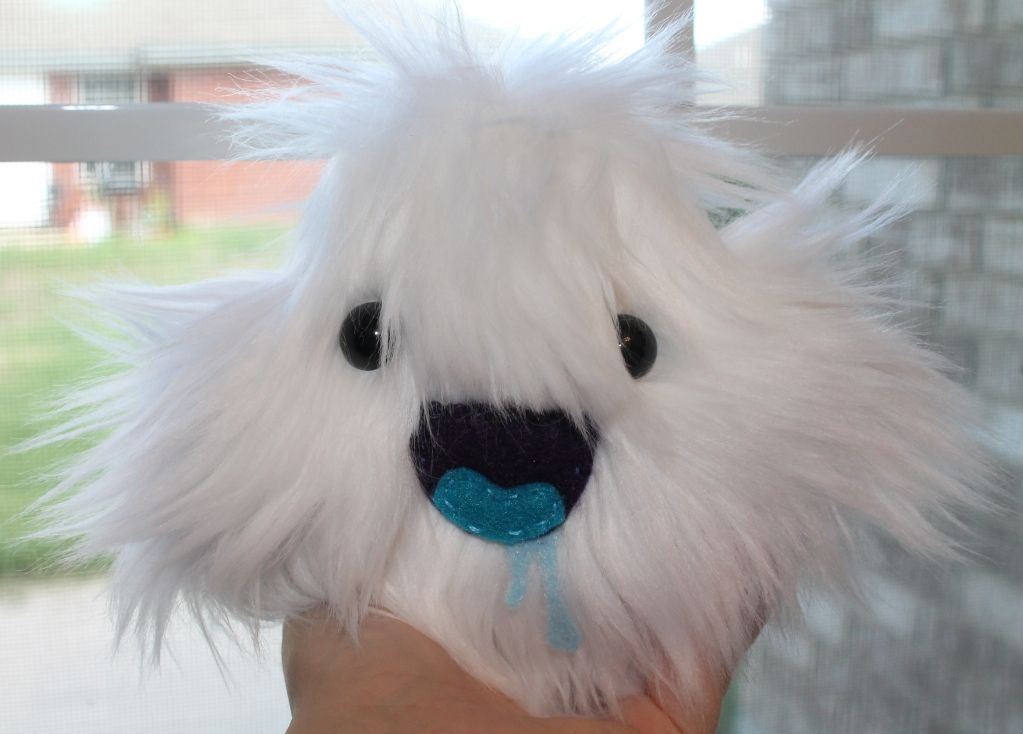
Thus is birthed, the Cloud Monster.  I have a feeling his species and I are going to get along great.  Apparently, they live in sky-caves and go birding, much like we go fishing.  Not to mention they are super cuddly and cute.  Making up all the different faces is a ton of fun.  It's great getting to see my sketches come alive in these little guys!  I sew felt pictures on the back of the larger ones to display their personality.  The babies have just plain backs, because they are still growing!


I created my pattern on cardboard (to save the pattern for multiple uses) and cut mirror images out of the faux fur for the two sides.


Designed his face in felt


and sewed him all together.  


Stuffed and fluffed!


The felt is easy to work with, and is one of my favorite fabric mediums.  It's great for a beginner if you want to start designing and making your own plushies.  You can literally draw on the felt, cut and backstitch it together if you don't know any other stitches.  The faux fur was a bit trickier, and it looked like I sheared a sheep in my living room when I was done cutting the pieces out.


I'm definitely going to make more of these.  I made about a dozen this past week and a half, and I still have about half a yard of gray faux fur in the old crafty closet that needs used up.


One of my little baby cloud monsters is already on it's way to it's new home in Ohio!  His new roomie named him Cosmo (cute!).  Yay for my Etsy's first sale! I think I'm going to send out the sketch page for each monster on his journey to his new home, so people can share in the creativity that birthed their new cloud buddy.

So long, Cosmo!


Gonna look into making a giveaway soon - stay posted!

Tuesday, July 17, 2012

Majora's Mask Hoop Art


The best Zelda game, in my opinion, is Majora's Mask. It's the video game that got me into video games as a kid (and now I have a triforce tattoo). I have a lot of Nintendo decor around, but nothing Majora. Hoop art is something I've wanted to try for a while now. Mixed the two together and this is what I came up with!


To make something like this, you simply start with the image you want to recreate in felt.  I blew up a picture of Majora's Mask and taped it to the window on the door for easy tracing.  

I took blank paper and traced the image onto the paper to create a pattern that I was then able to cut into the shapes of each color.  Trace the pattern on to each corresponding felt color and cut out the shapes!  It's almost like a puzzle.  It's imperative that you have an excellent sharp pair of scissors to cut the felt, or else you won't end up with clean lines, but frayed edges instead.  

To sew the pieces together, I used DMC embroidery thread.  I sewed them onto a stretched piece of black cotton fabric in a 12" wooden hoop.  The entire process took about 15 hours, but it's so worth it. I'm going to make a few different hoops in other sizes and make a collage in my entryway.  More updates on that later, as they are complete!  I'm working on a second one of these to put on my Etsy.


Saturday, July 14, 2012

Nerd Bunny!

I've been seeing a ton of really cute felt plush animals lately, and have been dying to try my hand at it.  The kids were rather cooperative with bedtime tonight so I had time to make one!  He fits in rather well with my decor on top of my desktop, don't you think?  I'm naming him Professor Rabbity.

It was actually surprisingly easy to make.  He's entirely hand sewn and made of felt, poly-fil (stuffing), rice and DMC embroidery floss, with 6mm safety eyes.  The floss, poly-fil and felt can be picked up at any craft store, even Wal-Mart.  If your craft store doesn't carry safety eyes, you can purchase them at Glass Eyes Online.  They are the best price I have found anywhere, and I received my last order in two days, which is pretty impressive. I got about 50 pairs of eyes in assorted sizes from 6mm to 30mm for about twenty dollars.

I made my own pattern for the bunny and his glasses, and cut it out on the cardboard from a 12 pack of soda we had in the garage.  That way, I have a pattern for next time I need to make a bunny like Professor Rabbity, and I won't have to remeasure him ever again.  I simply cut the pattern out of the felt, then decorated his front before sewing him together.


I stitched a few mathematical equations and math problems on his body so he wouldn't look so plain. All the writing is done in a simple back stitch. I added the safety eyes and sewed on his glasses, then stitch him together with the outside facing in. I left a two inch hole in his side, flipped him inside out so the seams were hidden, and stuffed him up! I boxed out the bottom of the bunny and filled it with rice so it would be weighed down and stand up.

Overall, I'm really pleased with him and he's even stable enough where I'd let my two year old play with him (with supervision of course).  This bunny's ears were pretty difficult to push through when I was flipping him inside out, though... so the next bunny is going to need a bit thicker ears.


Nintendo Cross Stitchery

I've been pretty busy lately with projects, and cleaning out the house.  We had a garage sale that went REALLY well, so I got some play money and decided to invest in a program called PC Stitch 10.  It's essentially a cross stitching pattern creator.  You can import pictures in, and it will tell you the DMC colors you need and give you a pattern.  I, of course, can never take the easy way... so I made a pattern from scratch!

My son received a Winnie the Pooh cross stitched birth record as a gift when he was born, but unfortunately for the twins they didn't.  No one was really up to making two (and I don't blame them, cross stitching can be a pain in the ... foot).  I'm redecorating the kid's room (and our living room) into video game themes, so I figured I'd stick with it when I went to make the pattern for their birth record.  This took about four hours of learning the program inside and out, but I finished it for the most part!


There are a couple things I want to change, maybe some spacer lines between the alphabet, numbers and birth information.  But overall I love it and think it's adorable.  I'm really looking forward to polishing this up a bit more and actually cross stitching it for my girls.  I'm thinking of making one Peach and one Daisy for the twins, and maybe making a Mario one for my son.  It would look super cute in their rooms in a row!

I have a couple of others I'm playing with for the moment.  If I get good enough I'll post a few on my Etsy.  Some of these would look super cute framed in an embroidery hoop.


Monday, July 2, 2012

Pop Art

Just ran across this on Pinterest and had to share!


This guy does Pop Comic Art paintings in acrylic and they are just amazing.  Those are paintings!! Check it out at http://popcomicart.tumblr.com/


Sunday, July 1, 2012

Chain Chomp Sign

We are in the process of redecorating my two year old's bedroom into a Nintendo theme.  He loves Mario!  He calls him "Mar-ro".  With the birth of our twins a few weeks ago, I want him to have his own personalized space so I decided to make him a room sign.  I love the look of pixel art, so after scouring the internet for a while I found this picture on one of my favorite sites, Sprite Stitch!


I love the chain chomp, but didn't love the holes so much, and the pixels were painted a bit messy in my opinion.  So I took the idea and made it into my own!

I picked up a few materials at my local hobby store (favorite store EVER).  For this project I used:


  1.  a 6x12 wood plaque
  2. a small bag of wooden letters
  3. acrylic paints
  4. gloss gel medium
  5. brushes
  6. a pen
  7. hot glue
  8. a ruler
Total project time, start to finish:  7 hours

Before I begin, I have to tell you... pixel art is a lot harder than it looks if you want it to look right.  You have to make your own pattern if you can't find one, make sure your grid is right and straight, and it takes tons of layers of paint.  But past all the complaining, it looks awesome if it's done right.

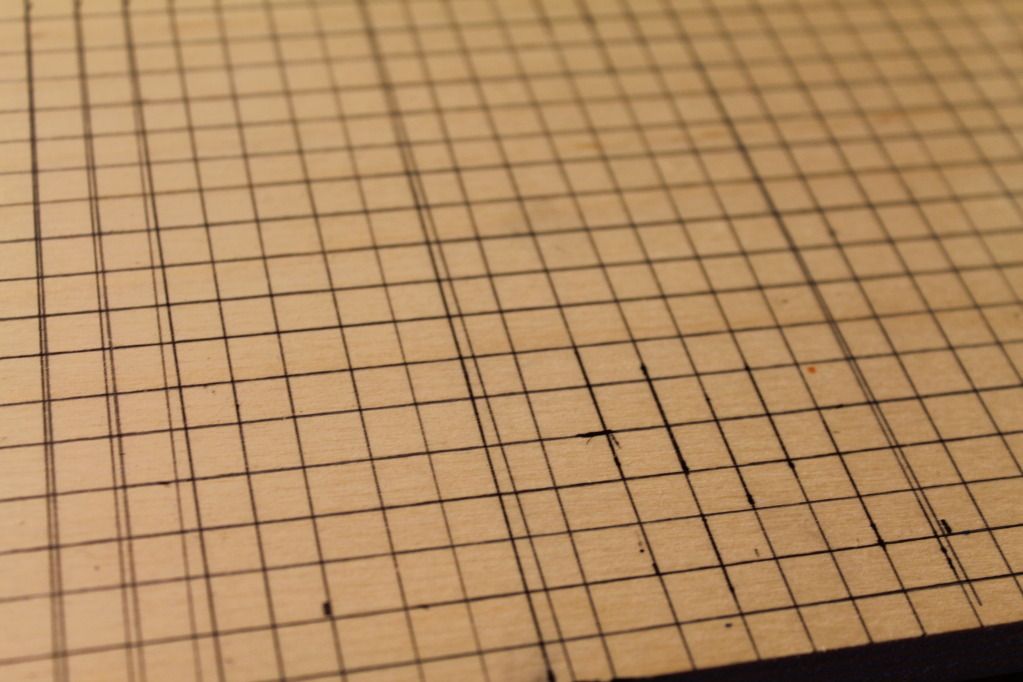
I started out making the grid on my plaque.  I like to use ink because it won't mix in with the paint, like lead tends to do.  If you use pencil, the white paint especially will become tinted a bit gray. 
The grid


The grid gave me a few issues, as you can see from the multiple tracings per line, but I got it right in the end.  

Next is transferring the pattern onto the grid.  For those of you who have used a cross stitch pattern before, the idea is fairly similar.  Give each color a letter or symbol, then where that color needs to be put the symbol in the corresponding box.

Transferring the pattern to the grid

With this particular pattern, a piece of the pixel image is diagonal so it takes a bit of extra effort.  After the chain chomp's is mapped out, and the first chain loop, there is a diagonal chain.  So we have to actually grid diagonally over the grid we have.  Using the same measurements from the main grid, just follow the diagonal lines on the grid where you need the chain to be and create a diagonal grid.  Use those math skills!

Sounds complicated?  Yeah, kind of is.

After finishing up the grid and transferring the rest of the pattern over... the fun part starts!  Painting!  I chose a similar light blue for the background that the original painting had.  I mixed a light blue with gloss gel medium so I wouldn't have to use so much paint and so many layers.  Never used gloss gel medium?  It's a paint thickener.  I usually use it for impasto paintings (heavily textured art) but it works great for this as well.  You can find it in the acrylic paint aisle. Kind of pricey, but worth it in my opinion.

The paint, brushes and mediums used for this particular project.


I used square headed brushes (of course) because I wanted to keep sharp straight edges.  This step requires tons of patience and a steady hand.  Use those yoga breathing techniques!  A larger brush worked out well for the large part of the background...

You can see that it's going to use more than one coat of paint, even with the medium added. Imagine without it!


But a smaller, square detail brush was needed for the insides of the chains and other small areas.

After three layers of paint, I could move on to another color.  First black...


Then white and red.


I used the smaller square brush for all the colors of the chain chomp so I could achieve those small straight squares.  In between layers of paint and waiting for it to dry, I picked out my letters for "Noahs Room" (my son's name) and painted them a contrasting blue.  I aimed for a Mario blue, like his overalls.

Before...
After!
Once everything is dry, I attached the letters where I wanted them and ....

TA DA! Finished!
I found the little easel at my local craft store, since I didn't want to put holes in it.  It will look super awesome on his dresser when we are done redecorating!


I can custom make this sign for you, just check out my Etsy!